MacroFactor makes it easy to create and edit custom foods. The custom food wizard is quick and intuitive once you’ve used it a couple of times, so don’t let the length of this page scare you. In an effort to accommodate multiple types of popular nutrition labels, there are multiple paths you could take through the custom food creation wizard, and this Knowledge Base article will cover all of them. However, as an individual user, you’ll probably end up taking one of those paths WAY more frequently than the others, so don’t feel like you’ll need to learn and memorize everything in the guide.
There are four ways to access the custom food wizard.
1. Tap the + button near the bottom of the screen, and then tap “New Food”
(You may wish to configure your shortcuts and toolbar so that custom food creation is just one tap away on most pages of the app, if this option is not available already.)

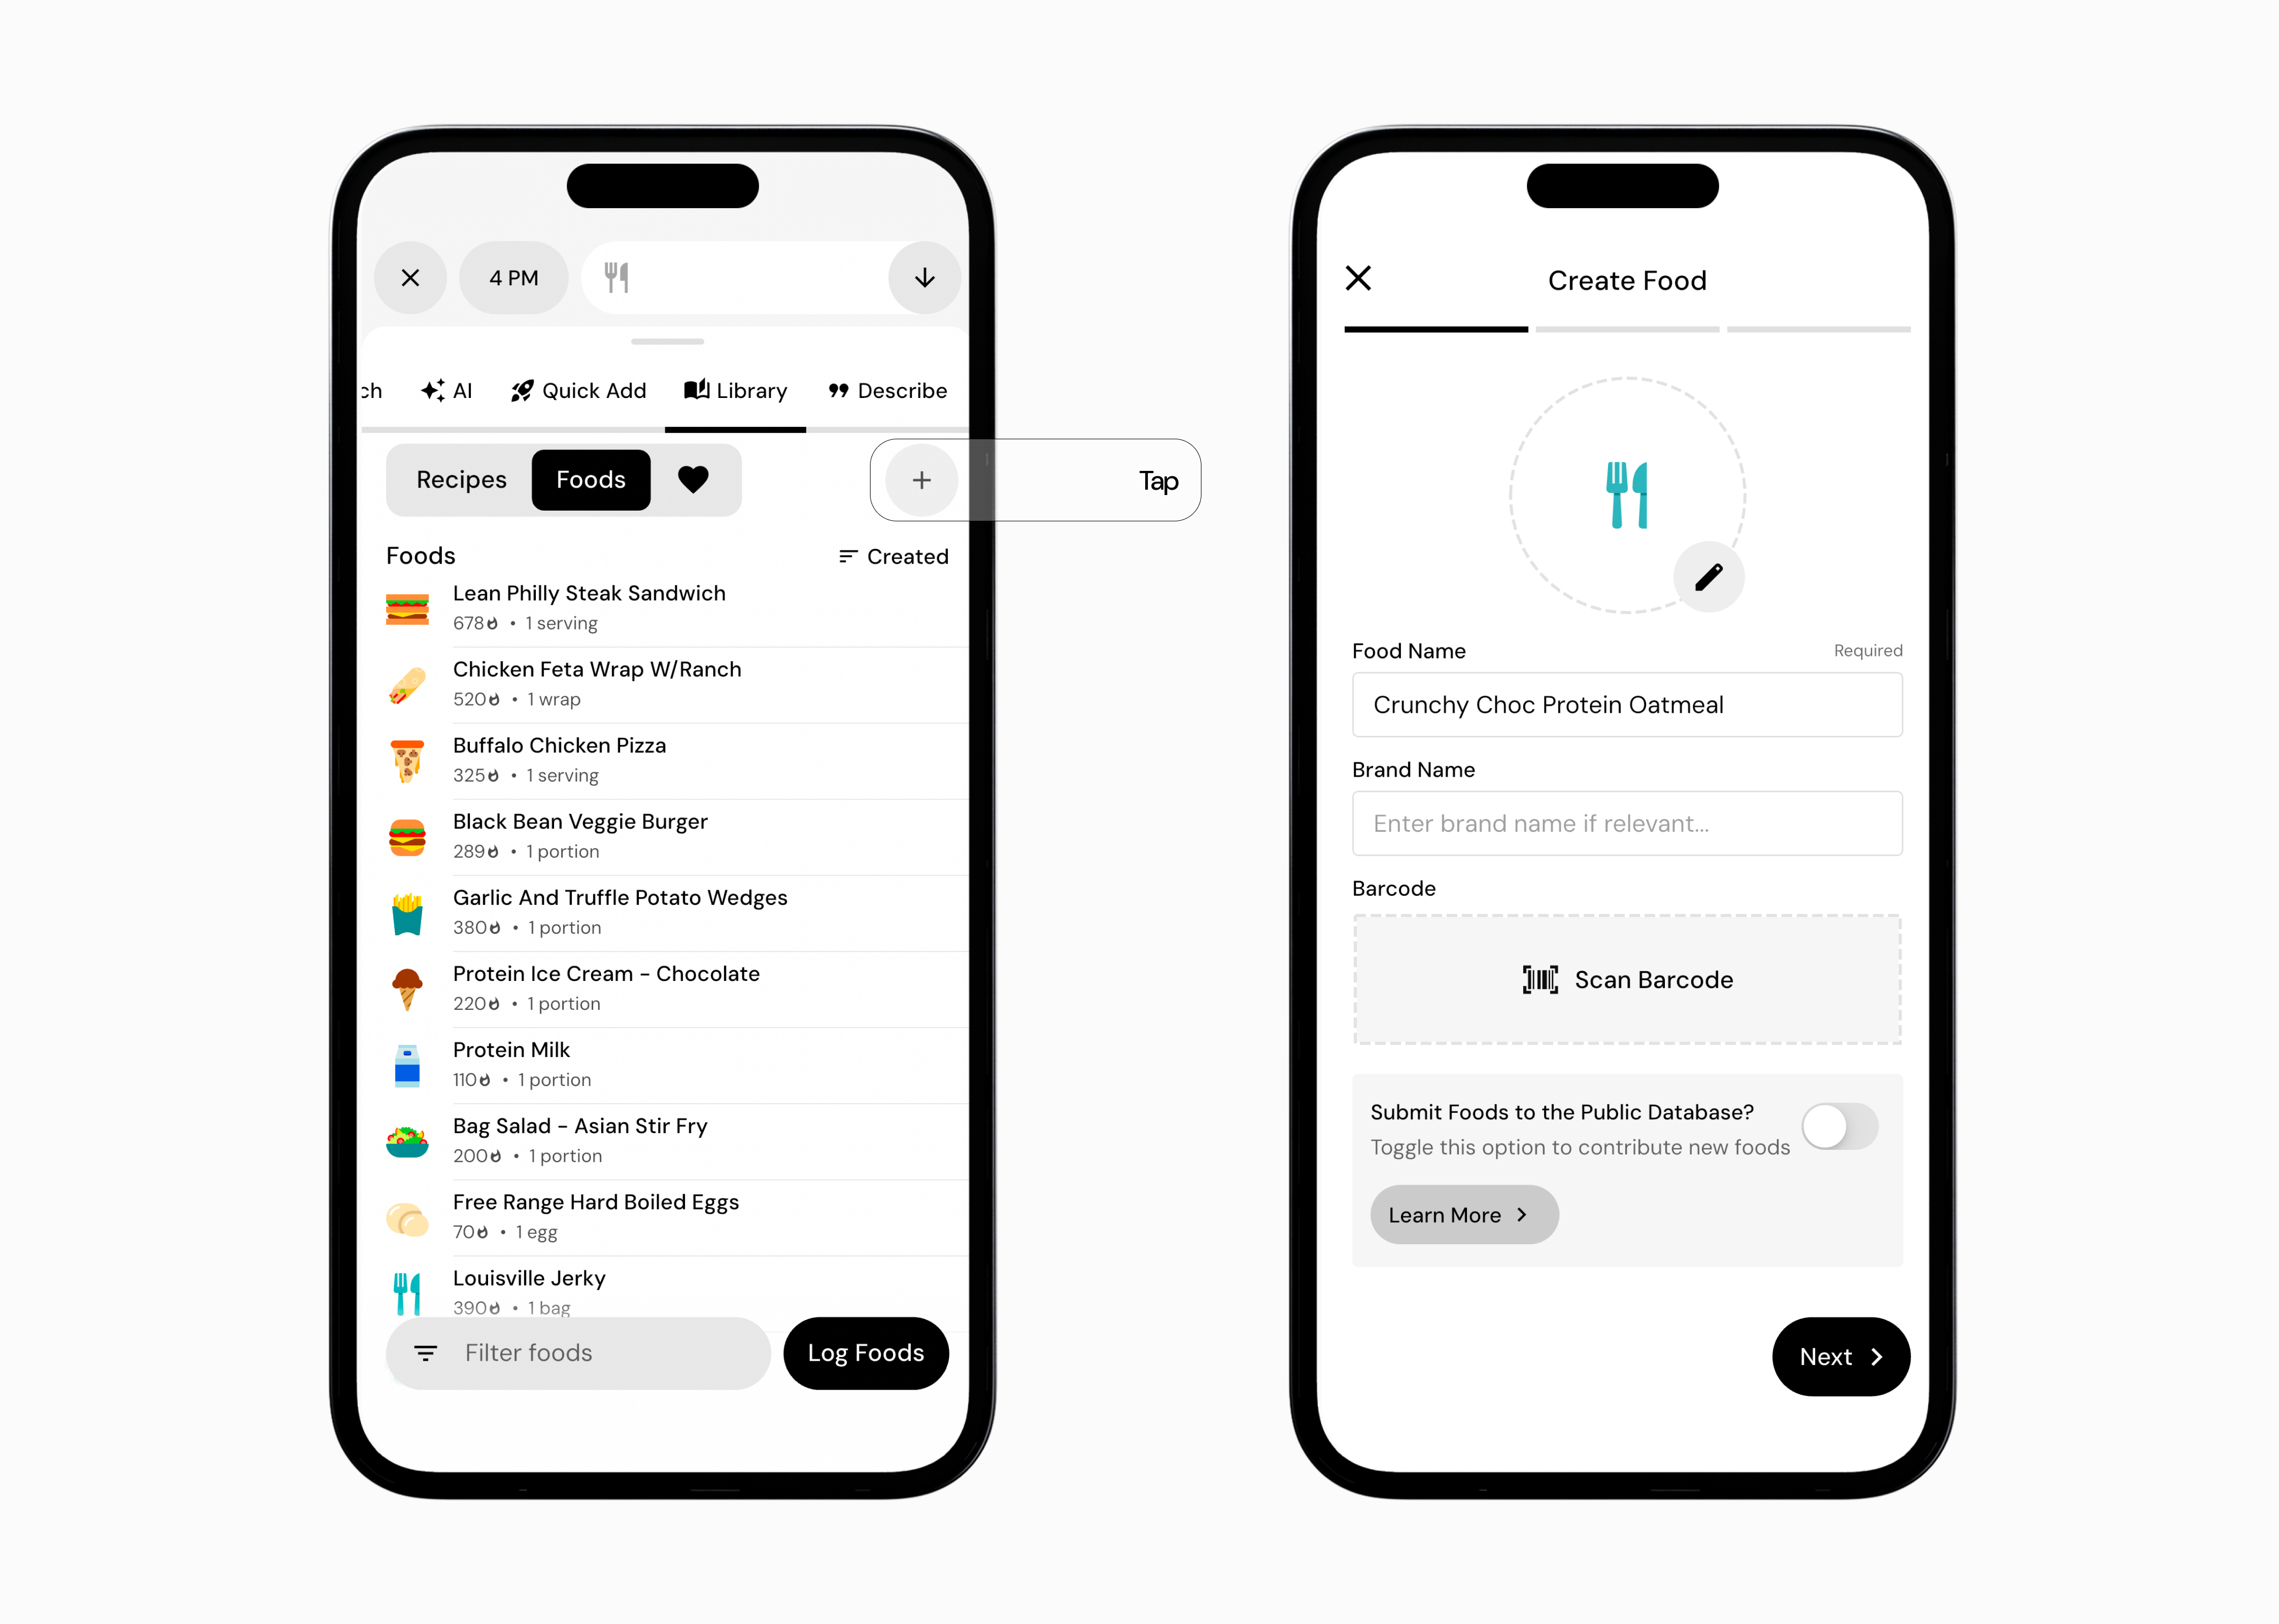
2. From any other food logging workflow, swipe over and tap on “Library,” and then tap the + button that’s to the right of the heart (favorites) icon.
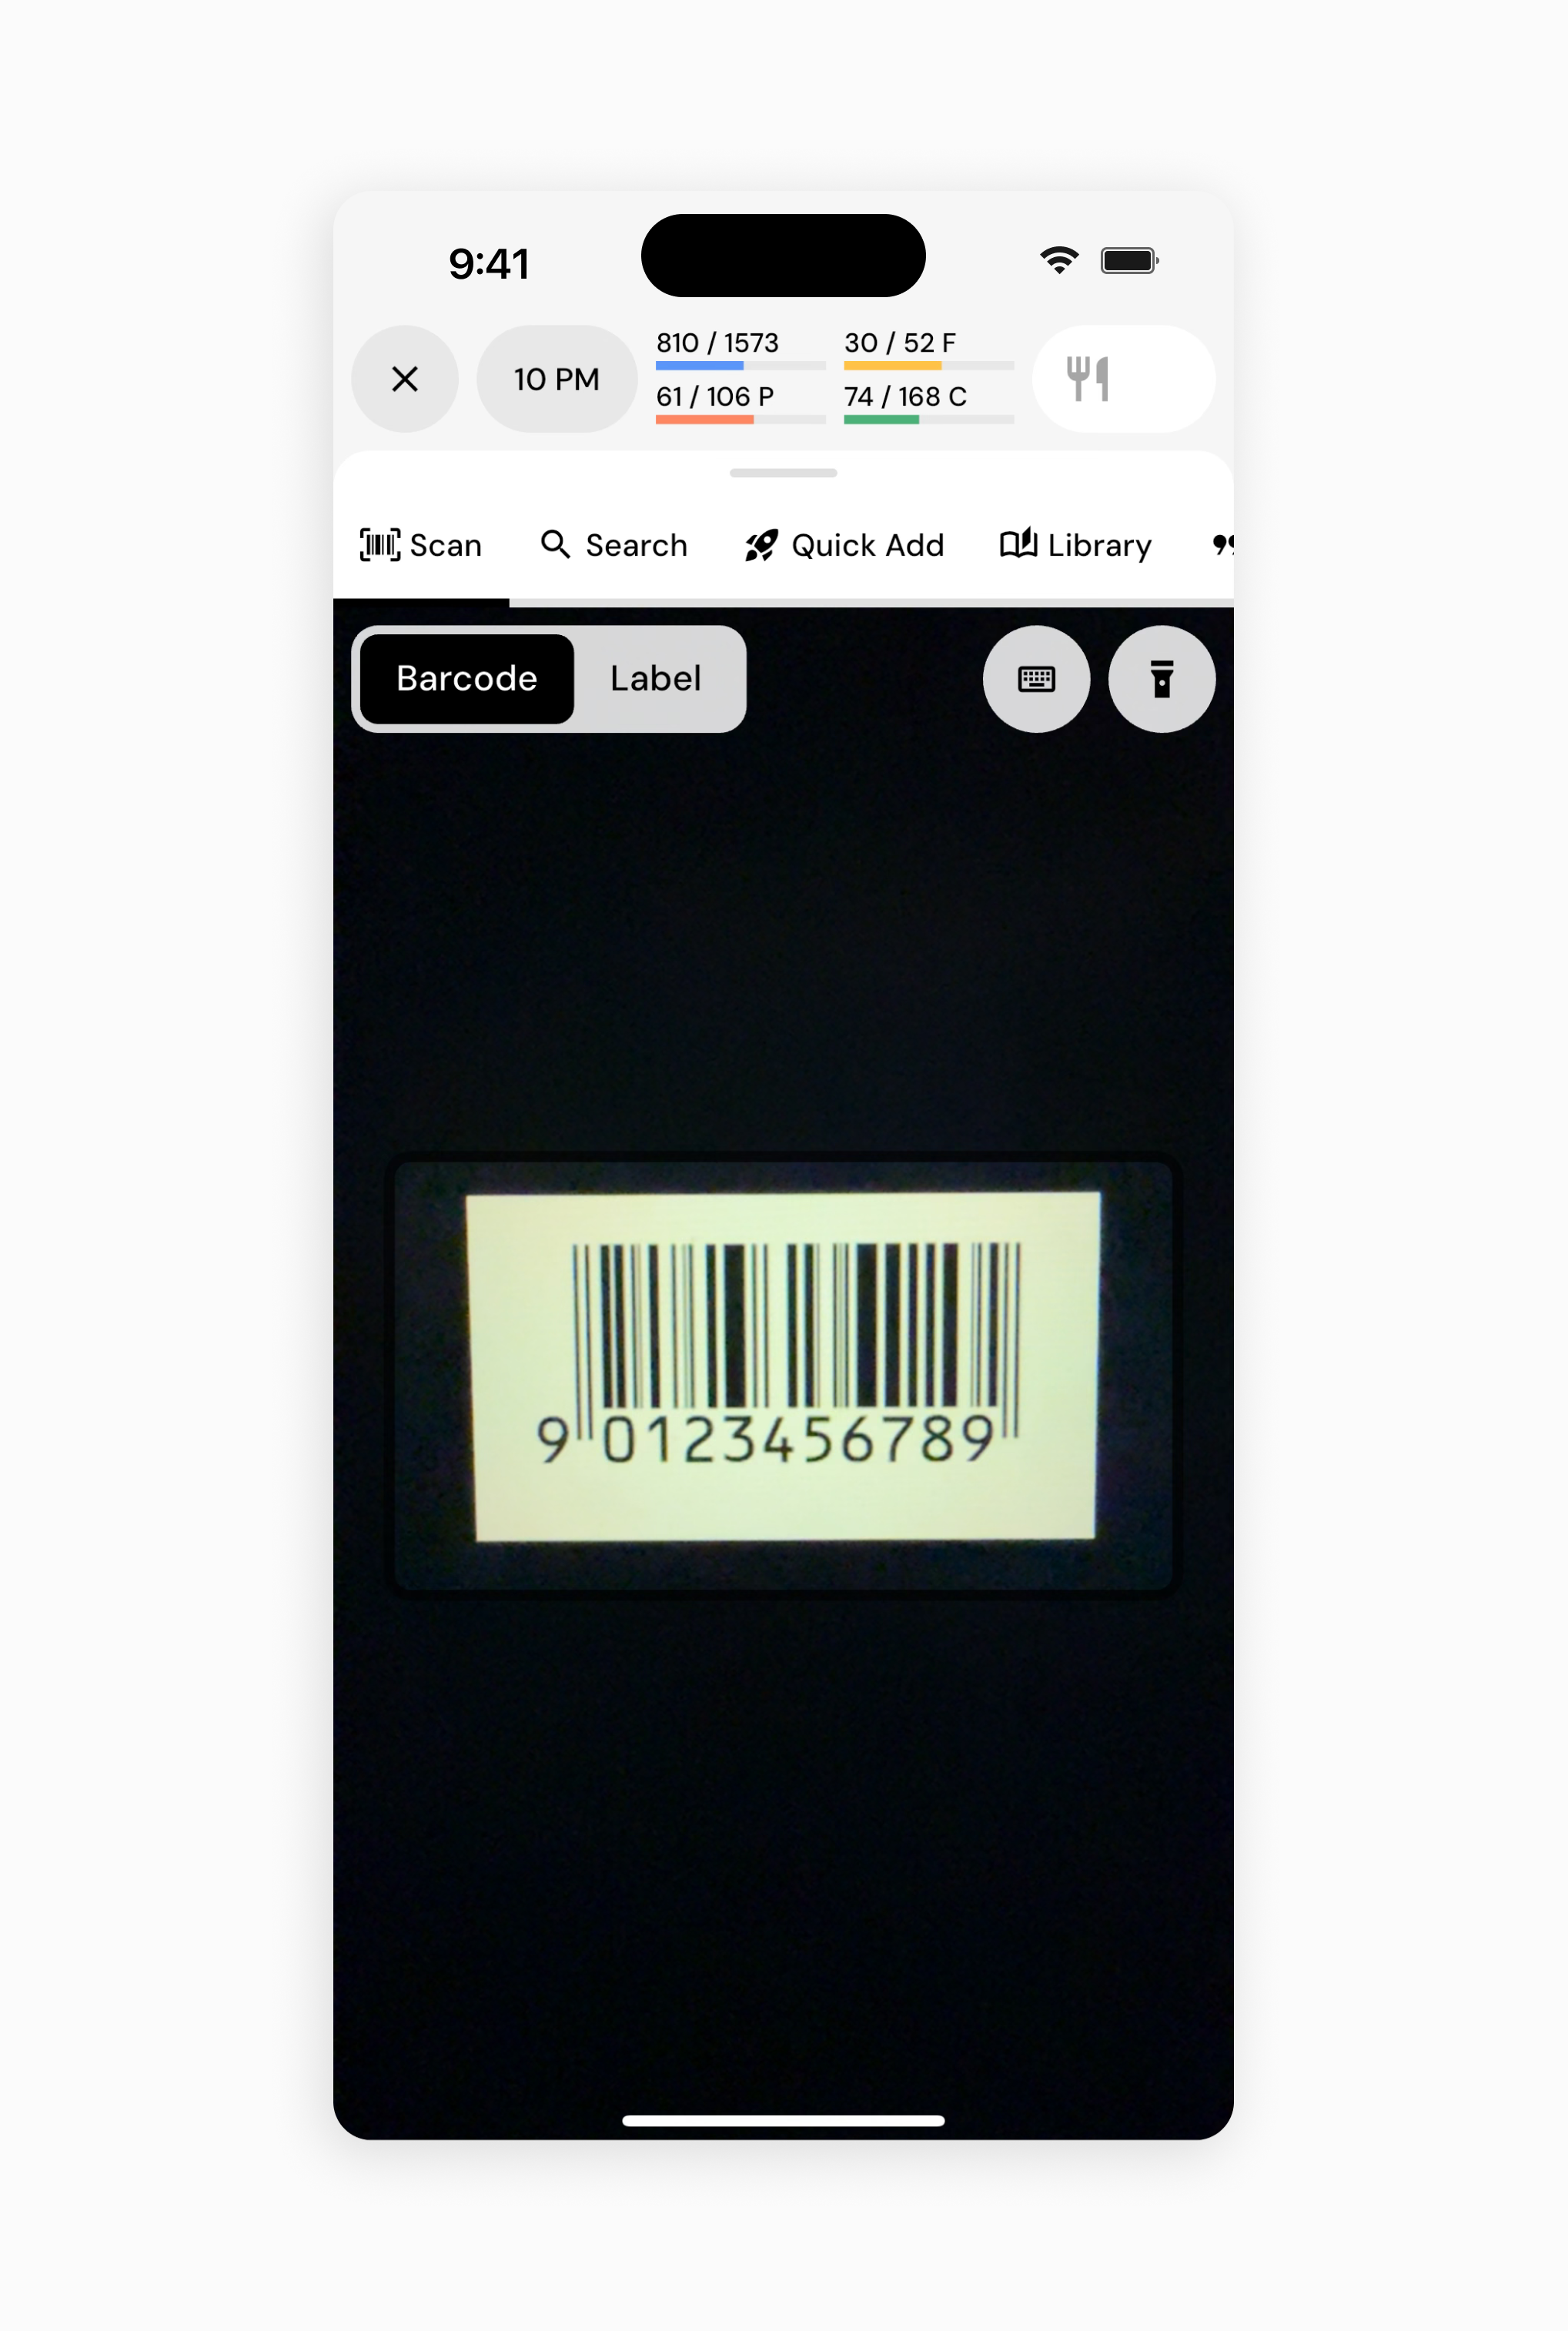
3. If a barcode scan fails, the app will automatically switch to the label scanner tool, where you can take a quick photo of the nutrition label instead.
4. On any food item, you can use “Copy to Custom.” Of note, if you use Copy to Custom, all of the steps below will be presented in a single screen, rather than on successive screens in a wizard. This is the standard flow for editing a custom food.
There will be two options presented for building your custom food entry:
Build from Scratch
Import with AI
The Import with AI option allows you to create custom food entries by taking photos of the front of the product and the nutrition label. You can also upload the photos using the upload button on that page. Once you have the photos you’d like to use, you can tap Analyze, and the app will review the images, read the visible text, and create the custom food entry for you.
For best accuracy, make sure you take or upload clear photos with good lighting and all relevant details visible. Otherwise, the app may not capture all of the information correctly.
On the first screen of the custom food creation workflow, you can add four things: an icon to represent the food, the name of the food, the brand name, and the barcode.
The food name and brand name should be pretty self-explanatory. If you were creating a custom food entry for a strawberry smoothie from a restaurant called Smoothie Shop, the food name would be “Strawberry Smoothie,” and the brand name would be “Smoothie Shop.”
To select an icon to represent the food, tap the edit icon. You can just scroll down the list of all icons until you find one that would adequately represent the food, or you could select from any of the categories near the top of the screen to expedite your search. Tap your desired icon to select it, and then tap the “Select Icon” button. Of note, you don’t need to select an icon for each custom food you create, but selecting an icon does help you visually sift through the foods you log or create.
Lastly, if you’d like to associate a barcode with your new custom food, tap the “Scan Barcode” button. If you reached this page from copy to custom, and the food you’re editing was already associated with a barcode, you won’t need to re-scan the barcode to re-associate it with your custom food. Finally, if you can’t scan the barcode for whatever reason, you can tap “Enter barcode manually” to type in the number located on the barcode.
Here’s how this page might look once it’s fully filled out:
Once you’re satisfied with the information you’ve entered on this page, tap “Next.”
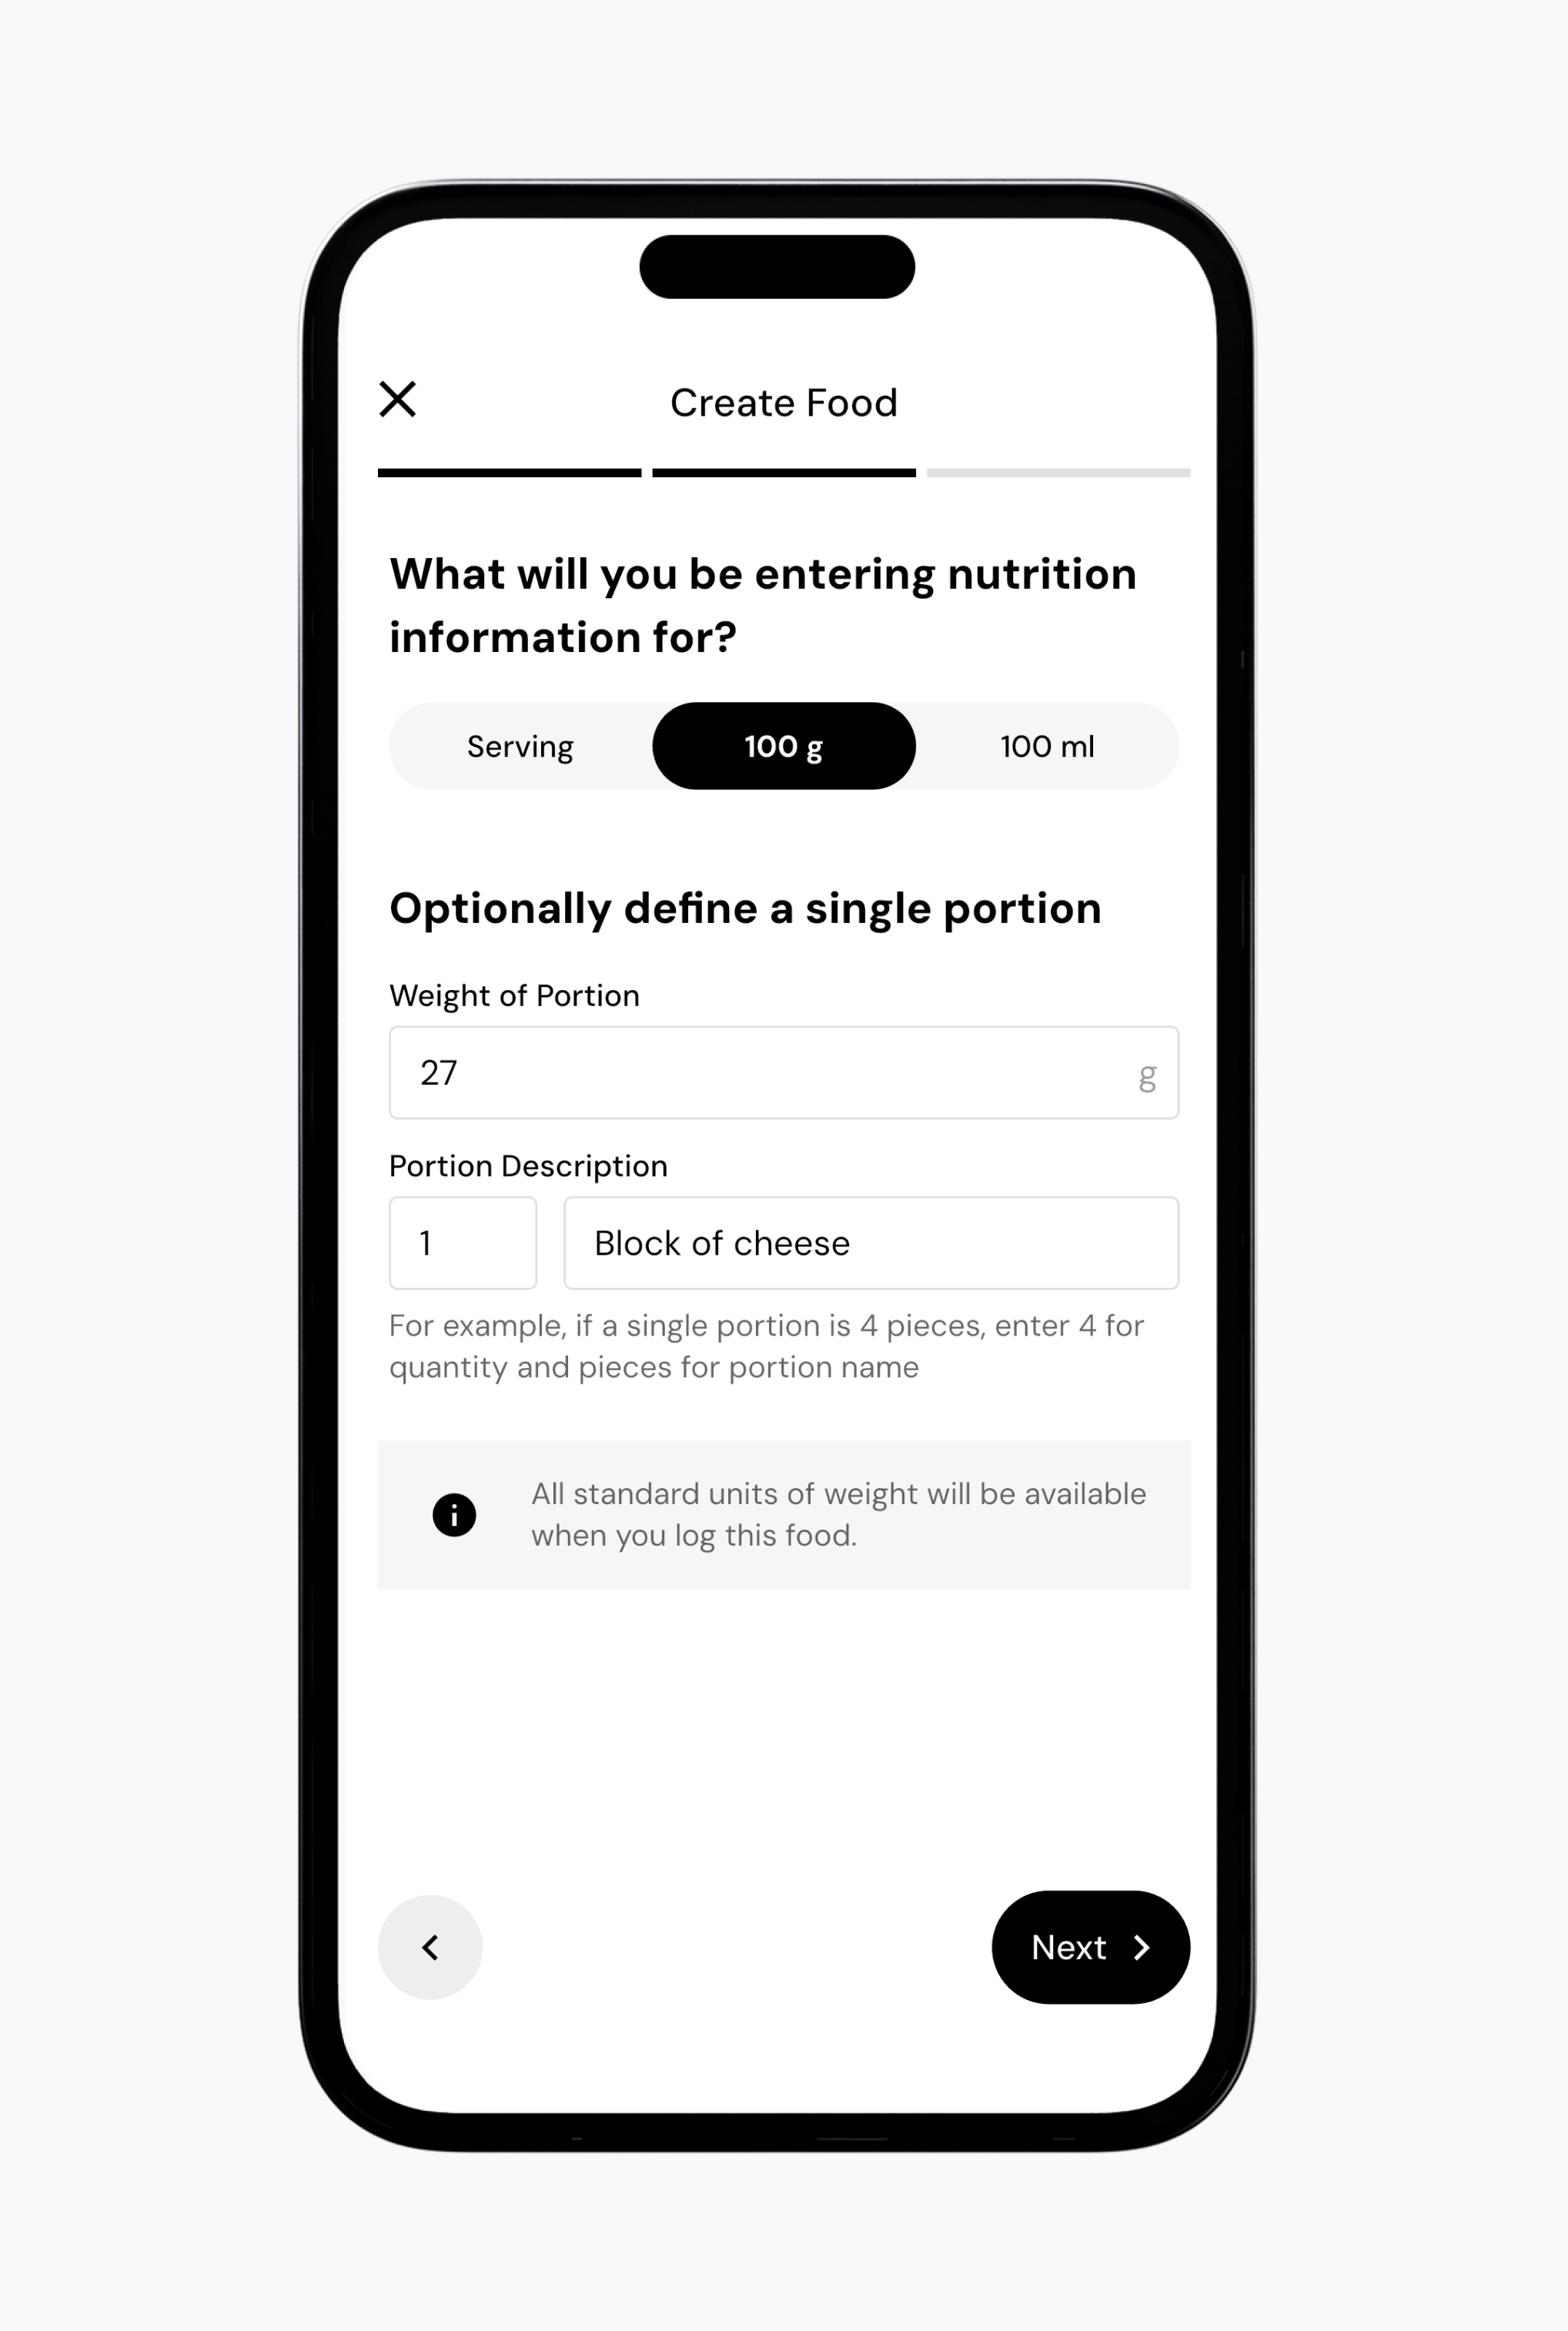
On the next page of the custom food creation wizard, you select whether you want to enter nutrition information per serving, per 100g, or per 100ml. Users in countries that print nutrition information per serving (primarily the US and Canada) should typically select “Serving,” whereas users in countries that print nutrition information per 100g or 100ml (most of the world outside of the US and Canada) should typically select “100g” or “100ml.”
If you’re entering the nutrition information per serving, you can enter the weight of a serving (optional, but recommended), the quantity of the serving, and the name of the serving.
For instance, if you’re creating a custom food for a pie, the serving size listed on the nutrition label is “1 slice,” and the weight of one slice is 80g, you’d enter 80 for “Serving Weight,” 1 for the quantity of the serving, and “slice” for the name of the serving.

If the default serving is listed in volume units, you can tap the “g” and switch it out for “ml.” For instance, if you’re creating a custom food for a soda, and the serving size listed on the nutrition label is 355ml for one can, you’d toggle “g” to “ml,” enter 355 for “Serving Volume,” 1 for the quantity of the serving, and “can” for the name of the serving.
If you just plan on logging in mass or volume units, you don’t need to fill out any additional information on this page. However, for convenience, you can also specify information about a default portion of the food you’re creating.
For instance, you might be creating a custom food entry for a cheese that comes in 27g blocks, and you’d prefer to be able to log “3 blocks of cheese,” instead of 81g of cheese. In that case, you’d enter “27” for Weight of Portion, 1 for the quantity of the portion, and “block of cheese” for the name of the portion. On the next screen, you’ll still need to enter the listed nutrition information per 100g of cheese, but when you log this cheese, you’ll be able to log 3 blocks of cheese, instead of needing to weigh your blocks of cheese or do mental math each time you log it.
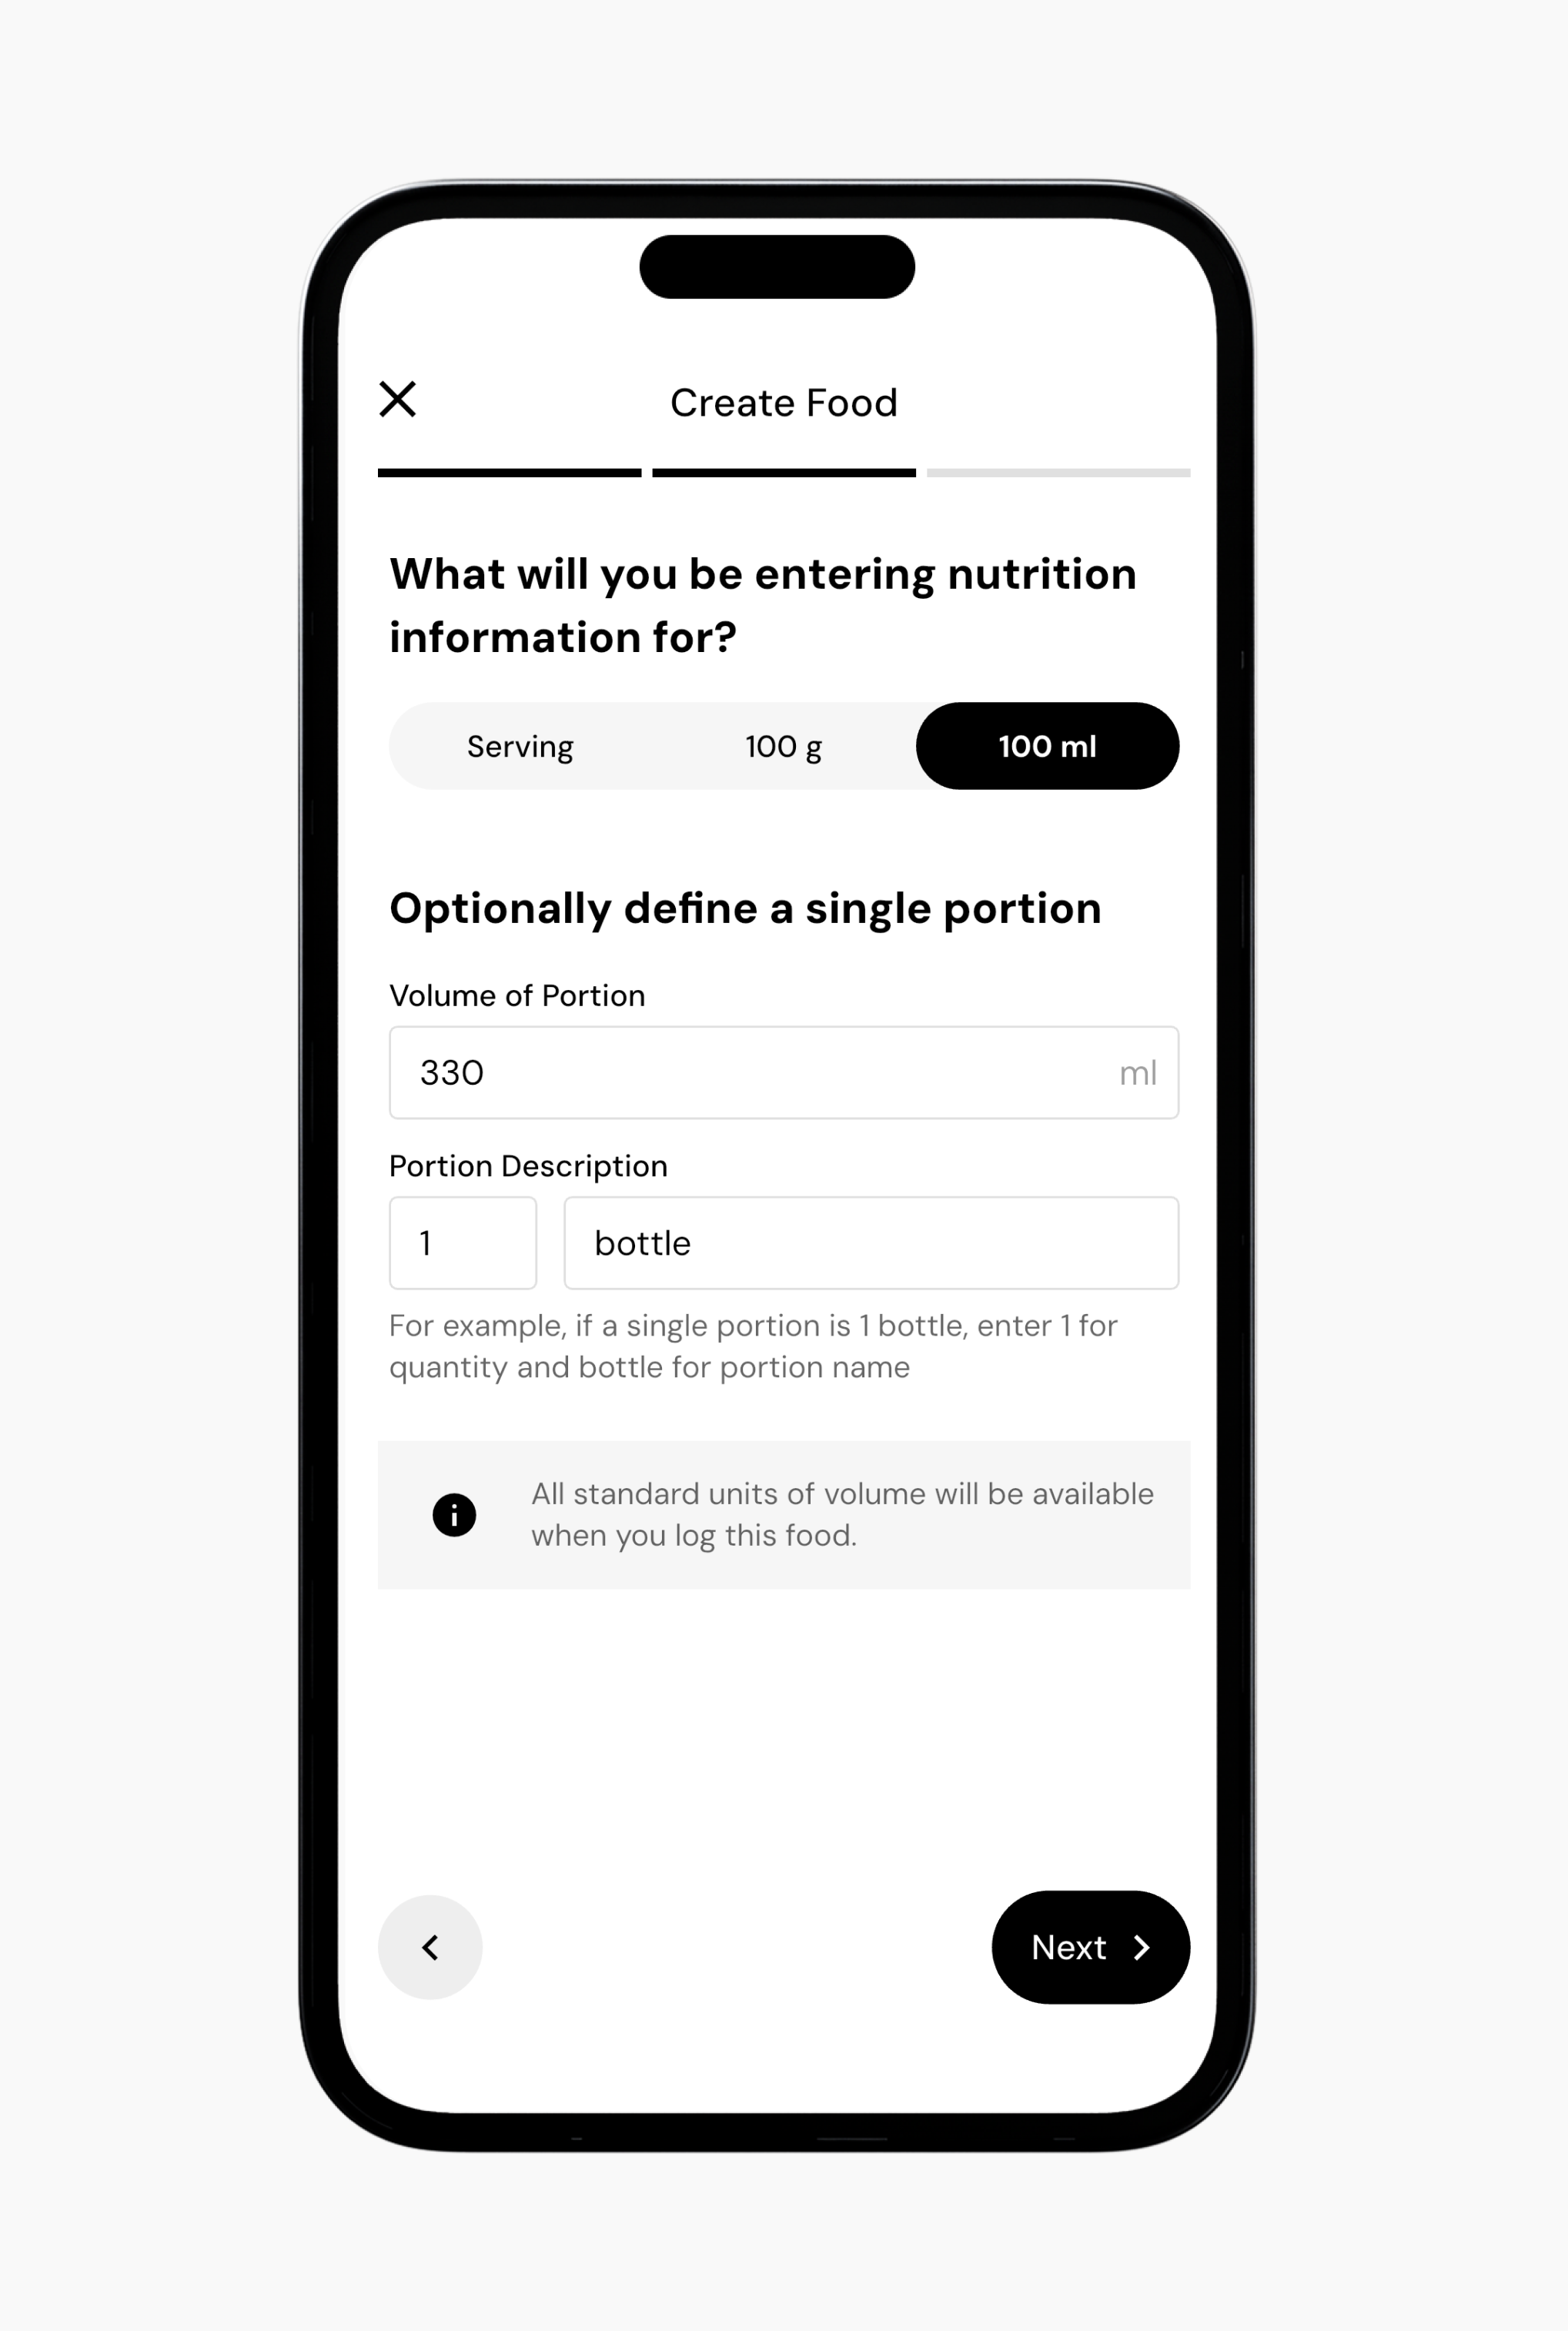
Similarly, you might be creating a custom food entry for a beverage that comes in 330ml bottles. If you wanted to be able to log 1 bottle of the beverage, instead of specifying that you consumed 330ml of the beverage, you’d enter “330” for Volume of Portion, 1 for the quantity of the portion, and “bottle” for the name of the portion. On the next screen, you’ll still need to enter the listed nutrition information per 100ml of the beverage, but when you log this beverage, you’d be able to log 1 bottle, instead of needing to specify that you consumed 330ml each time you log it.
Once you’re satisfied with the information you’ve entered on this page, tap “Next >”
Finally, you just need to enter the nutrition information for your custom food. You can select whether you’d like to enter nutrition information in an order that corresponds to a standard US nutrition label, a standard non-US nutrition label, or in the order of the “Food Detail View” elsewhere in MacroFactor.
This screen should be pretty self-explanatory, but there are a few small things to note.
1) The information you enter on this screen will correspond to the serving information option you selected on the prior screen. If you opted to enter serving information per serving (instead of per 100g or per 100ml), you’ll need to enter the nutrition information corresponding to that serving size. This should be pretty intuitive for American and Canadian users (since their nutrition labels do list out nutrition information per specified serving), but it may trip up some European users (since their nutrition labels typically list out nutrition information per 100g or 100ml, and may also list out nutrition information per specified serving).
So, for most people, creating most custom foods, most of the time, we’d recommend American and Canadian users to specify serving information “Per Serving,” and to enter their nutrition information on “US Labels.” Conversely, we’d recommend most other users to specify serving information “per 100g” or “per 100ml,” and to enter their nutrition information on “Non-US Labels.”
Finally, note that if you selected "per 100g" or "per 100ml" for your serving information, you'll need to enter the nutrition information per 100g or 100ml serving, even if you specified some other serving size. In the examples provided above, you'd still list the nutrition information per 100g of cheese (even though you created a custom serving for 27g blocks of cheese), or per 100ml of the beverage (even though you created a custom serving for 330ml of the beverage).
2) If you’re more comfortable thinking in kilojoules than kilocalories, you can toggle between the two when creating a custom food. The app can comfortably auto-convert between kilojoules and kilocalories.
3) Note whether your nutrition label lists “sodium” information or “salt” information. There’s a toggle for sodium versus salt (elemental sodium only accounts for about 40% of the mass of salt).
4) Vitamins A, D, and E are sometimes listed in micrograms or milligrams, and sometimes listed in IUs. You can toggle between these units to match the nutrition label of the custom food you’re creating.
5) Most nutrition labels won’t list the contents of most micronutrients, so don’t stress about blank fields when creating custom foods! Just fill in everything you can (or everything you want to).
When you’re done, tap “Create” to save your custom food, or “Create & Add” to save your custom food and immediately add it to your plate.
Now that you understand how to create and add a custom food, you might enjoy one of these articles next:
Create and Add a Custom Recipe