There are two ways to log foods to previous days. You can either navigate to a previous day from your food timeline, and then go through any standard food logging workflow, or you can go through any standard food logging workflow, and then select the date and time you’d like to log to.
You can navigate to a previous day several ways. You can:
Tap the calendar icon near the top of the screen to open the calendar, then select the date you’d like to view.
Tap a date in the row near the top of the food timeline. To view another week, swipe left or right on the date row, then select a date from that week.
Swipe from left to right in the blank space of your food timeline to view the previous day.
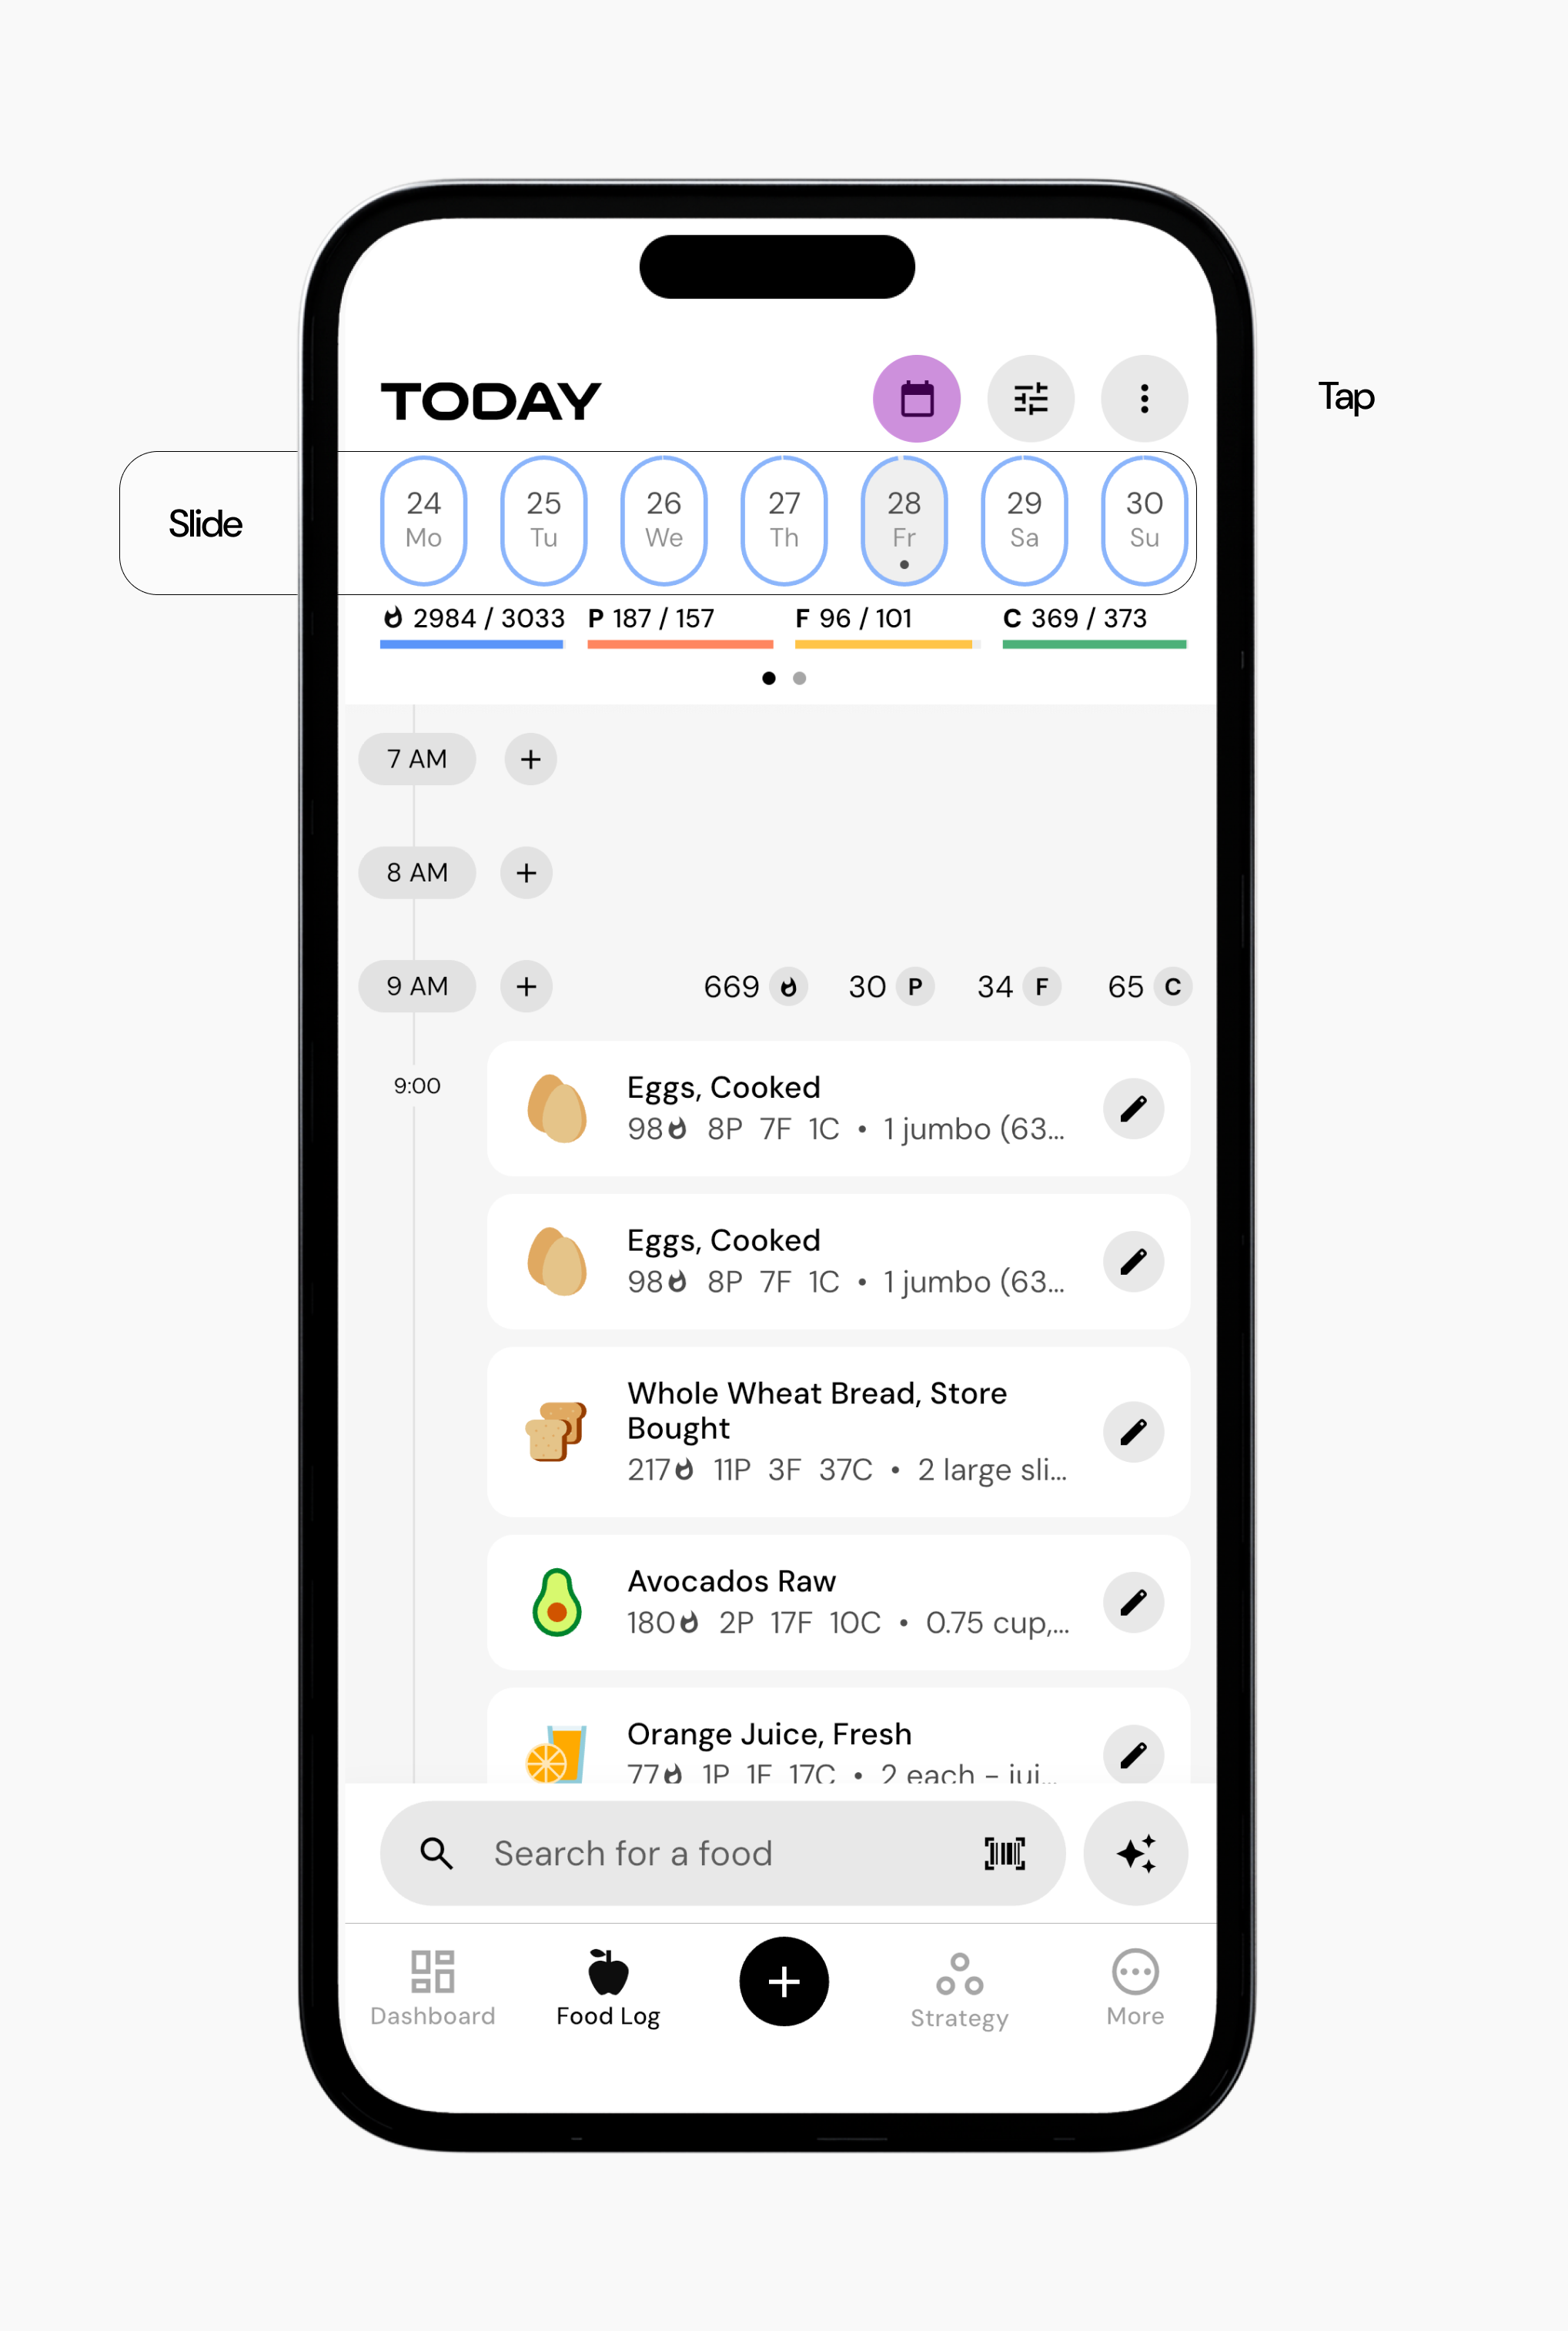
Once you reach the day you’d like to log food to, go through any standard food logging workflow to log food to that day.
Alternately, you can go through any standard food logging workflow, but before tapping “Log Items” from your plate:
Tap the calendar icon beside “Log Items.”
Select the date and time you’d like to log your food to.
Tap “Log to Date and Time.”
You can configure your calendar icon to display two different styles of date & time. Once there, select whether you’d like to view the Date Time Picker or the Time Pad when logging to specific dates and times.
Logging food to a previous day will update your expenditure and coaching recommendations. So, if you’ve previously left some days blank, or you have several partially logged days, and you think those days with missing or incomplete food logging may be negatively impacting your nutrition recommendations, we’d recommend logging (or simply estimating) your nutrition intake for those missing meals or days.
Now that you’ve learned how to log food to previous days, you might enjoy one of these articles next:
How to Configure Your Food Timeline