You can extensively customize the food timeline to suit your own needs and preferences. To explore all of the food timeline customization options, go to the “More” menu, scroll down to “Feature Settings,” and tap on “Food Log.” Once you’re there, scroll down to “Timeline Options.”
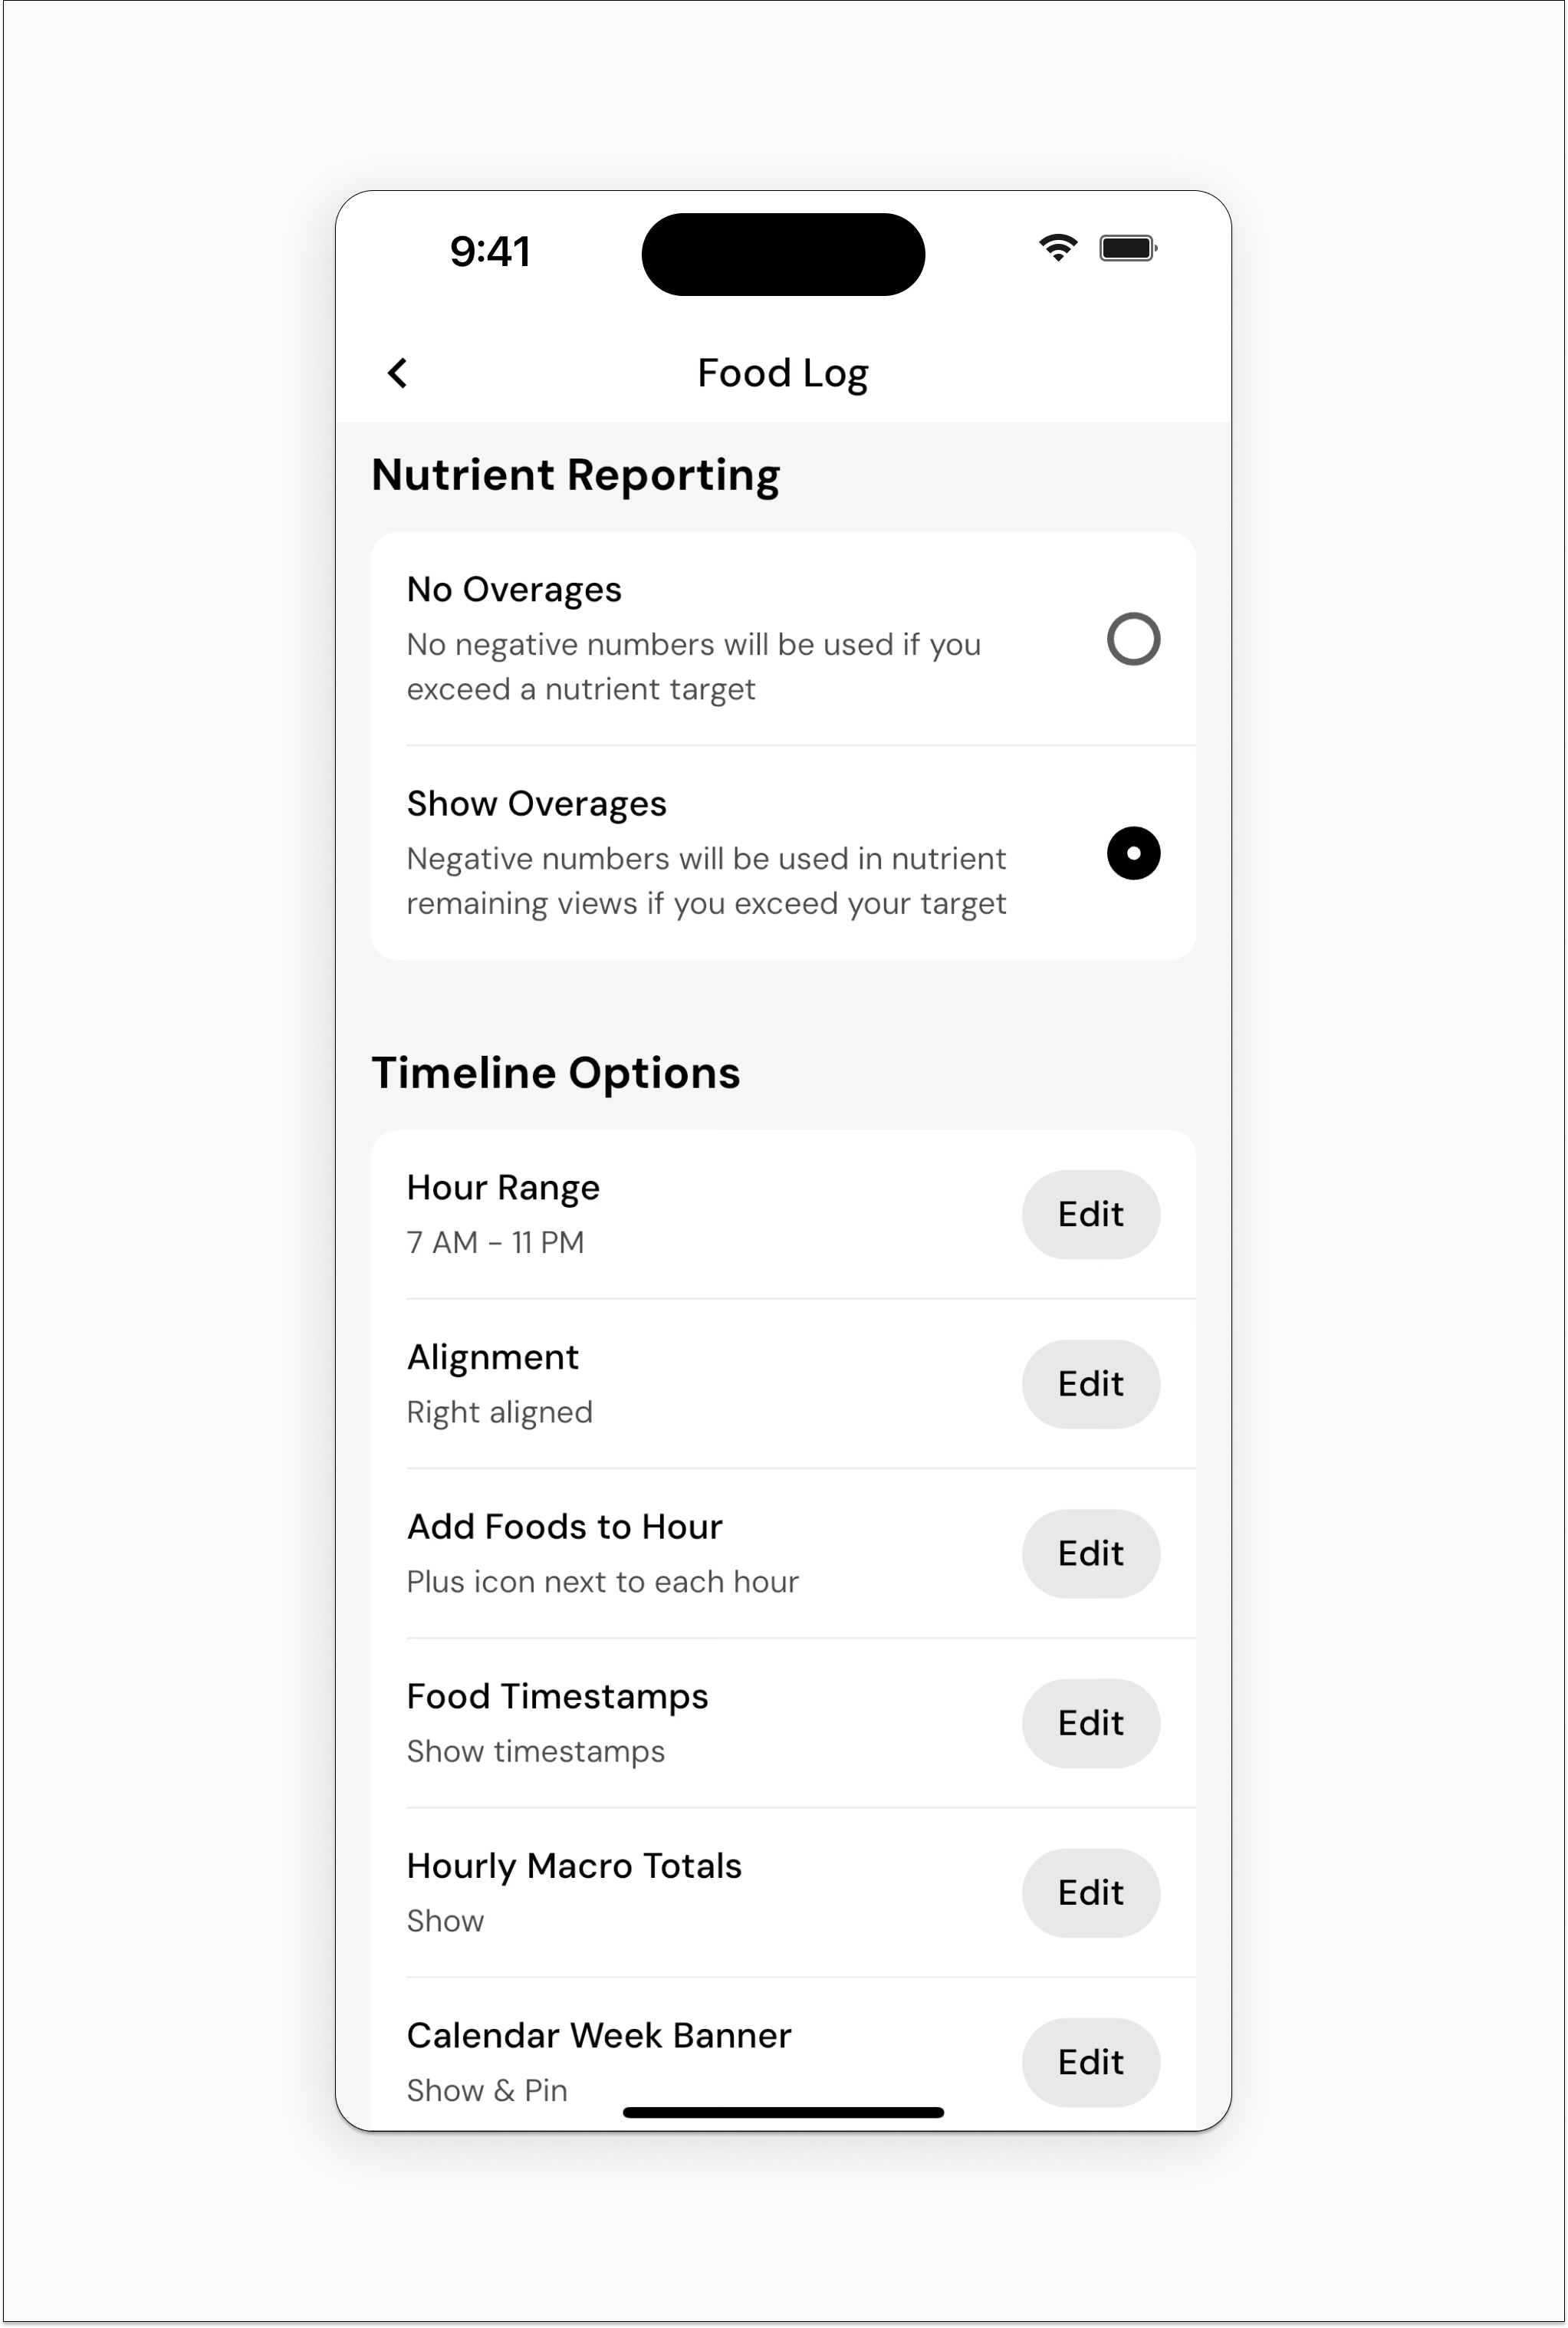
Timeline Hour Range
This determines the hours that will be displayed on your timeline by default. Instead of displaying all 24 hours by default, many users prefer to hide the hours when they’re usually asleep, so that there’s less blank space above their first meal of the day, and after their last meal of the day.
Alignment
This determines whether the hours and “Add Foods to Hour Shortcuts” show up on the right side of the screen (recommended for right-handed people), or the left side of the screen (recommended for left-handed people).
Add Foods to Hour Shortcut
With “Plus icon next to each hour” enabled, you can log foods to any hour with a single tap. This is the default option. However, if you prefer to remove the plus buttons, you can instead opt for “Long-press hour shortcut.” This will still allow you to log foods to any hour, but you’ll need to long-press on the hour, instead of tapping a button beside the hour.
Food Timestamps
Do you want to see the exact time you ate (or at least logged) each food? If so, leave this option enabled. If you’d prefer to remove the time stamps, and only see the hour to which you logged each food, you can disable the timestamps.
Calendar Week Banner
“Show” is the default option. It puts the calendar week banner at the top of the screen (which allows you to quickly navigate between days within a week), but the banner will collapse as you scroll down your food timeline. If you don’t want the banner to collapse when you scroll, you can instead select “Show & Pin.” Finally, if you have a small device and want to reclaim a bit of vertical space, you might want to select the “Hide” option so that the banner won’t show up at all.
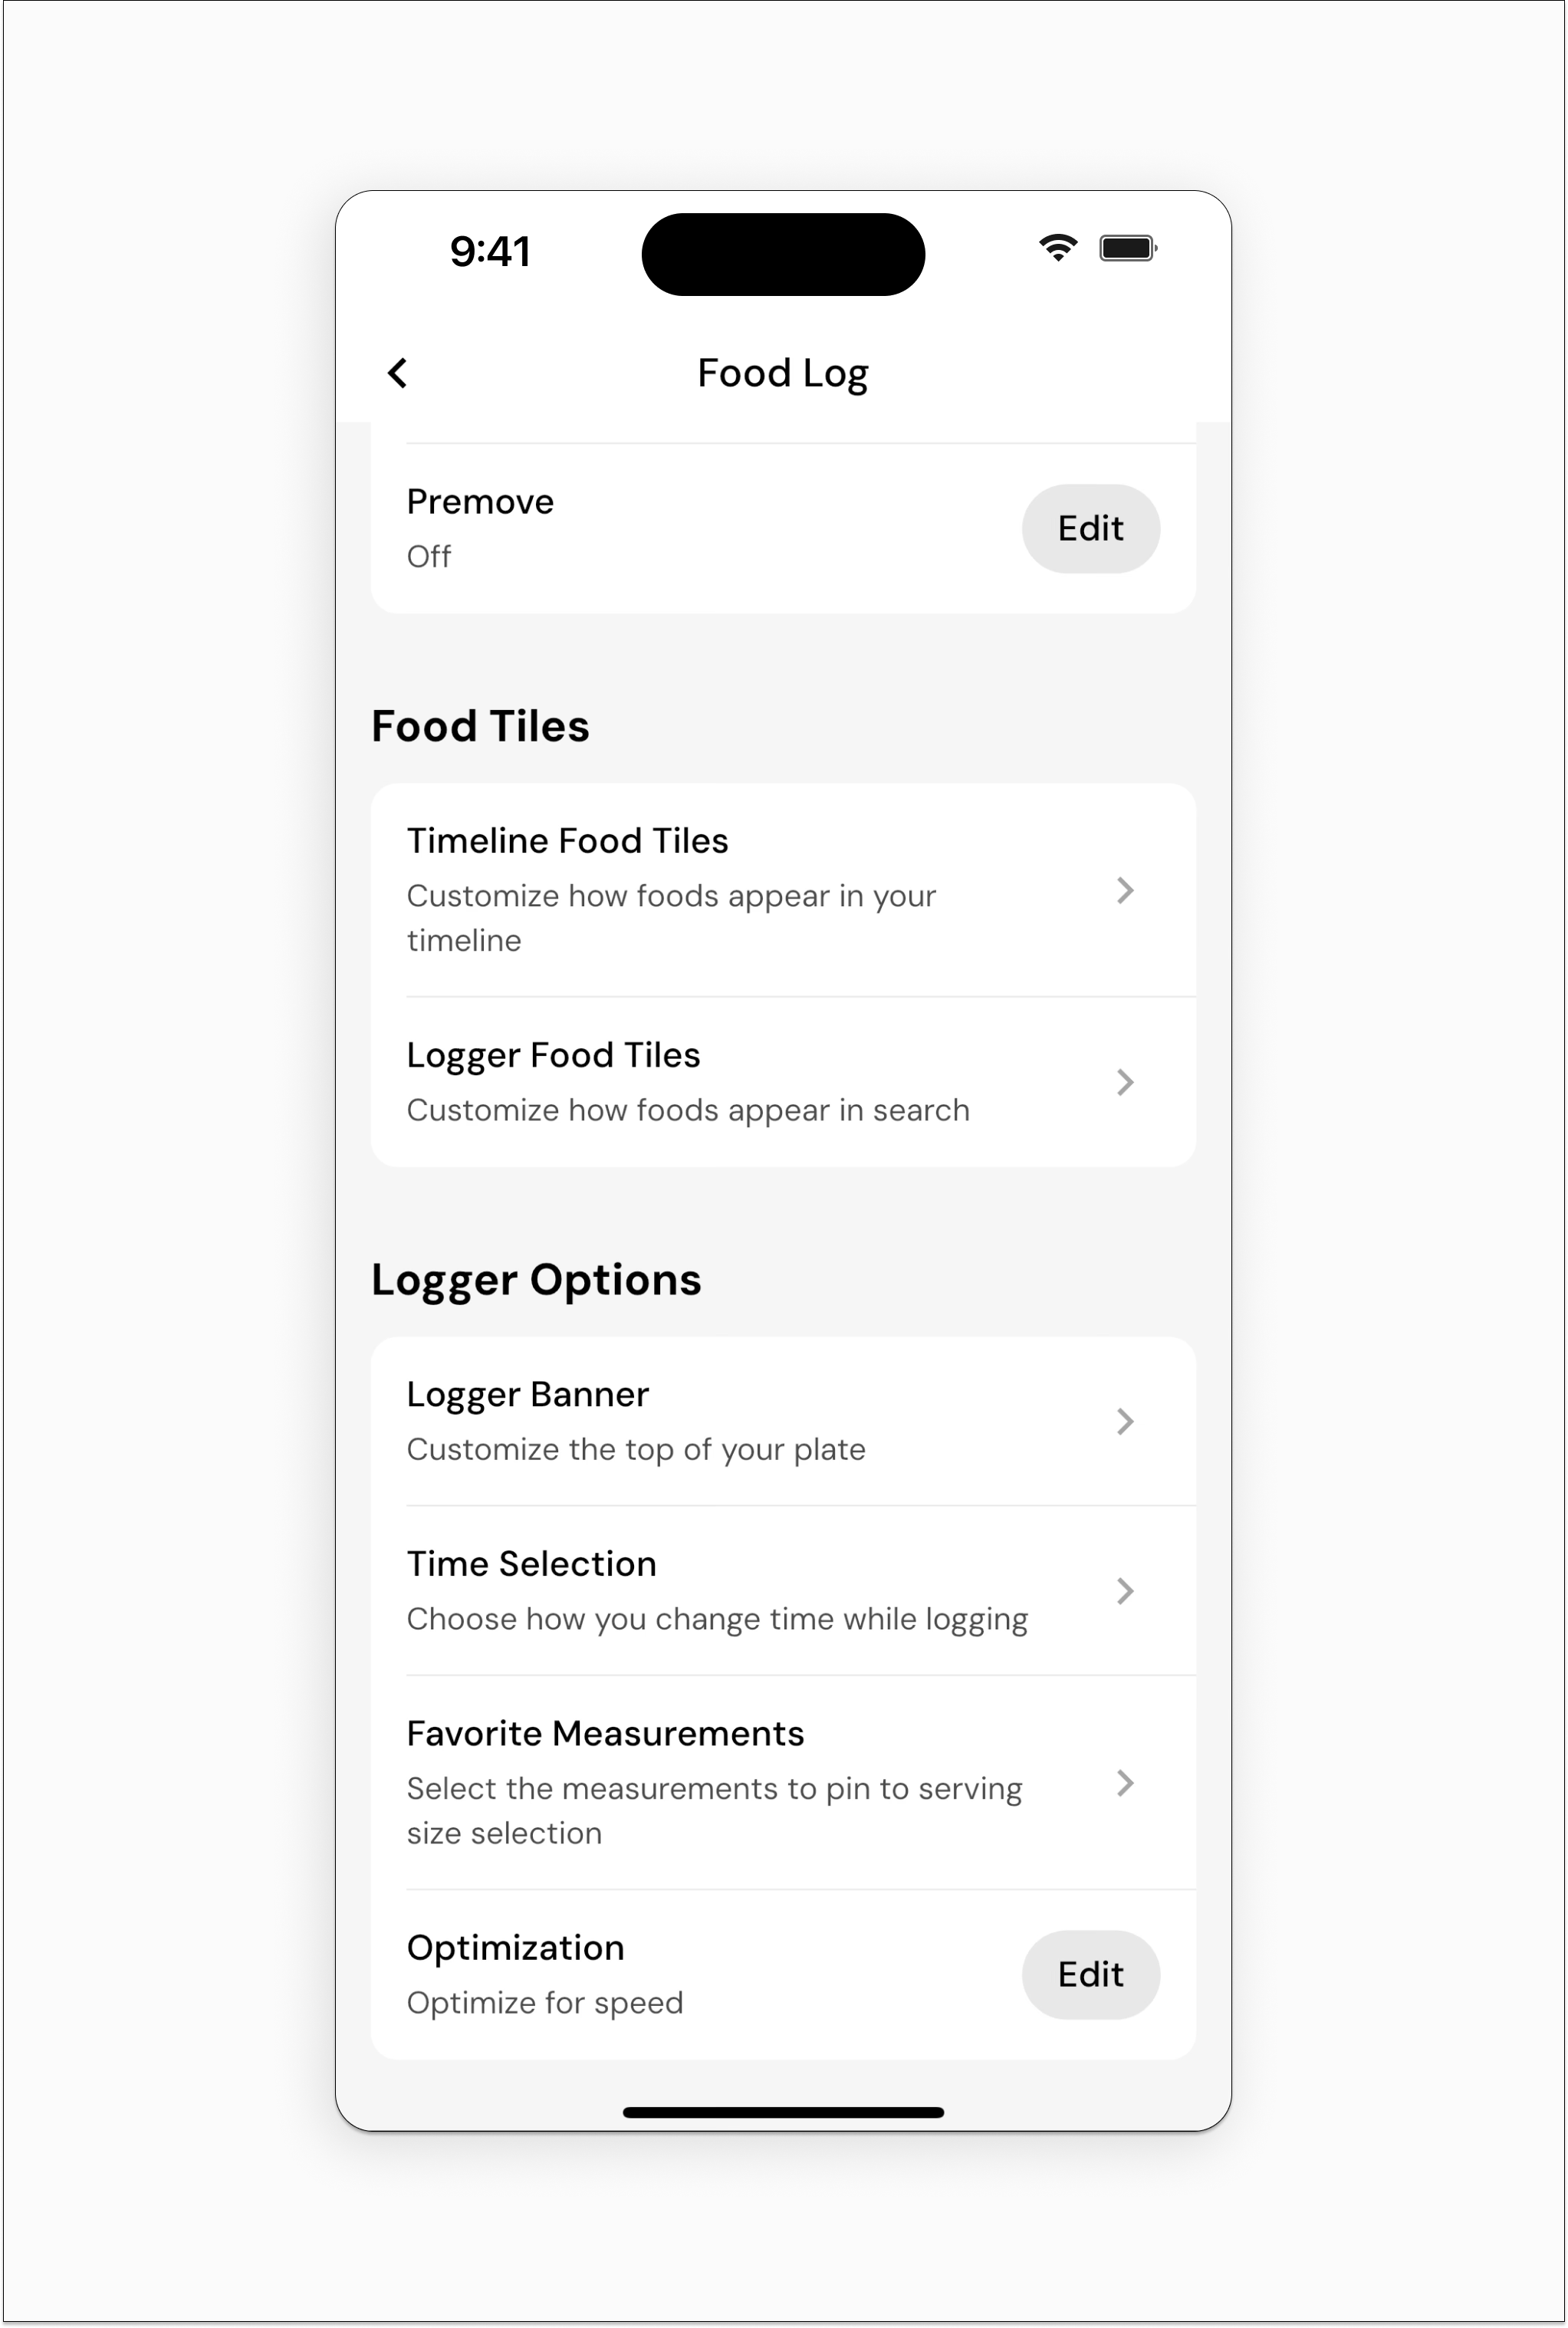
Premove
With premove enabled, you can move foods around your timeline with two taps: just tap the food, and then tap the hour you’d like to move it to. With the option disabled, you’ll need to tap “move” after selecting a food in order to move it.
Timeline Tile Design
Customize your Food Tiles to change how your foods appear in your timeline and when you search. Use the Timeline Tile Builder to customize how foods will look on your food timeline.
Timeline Food Tiles
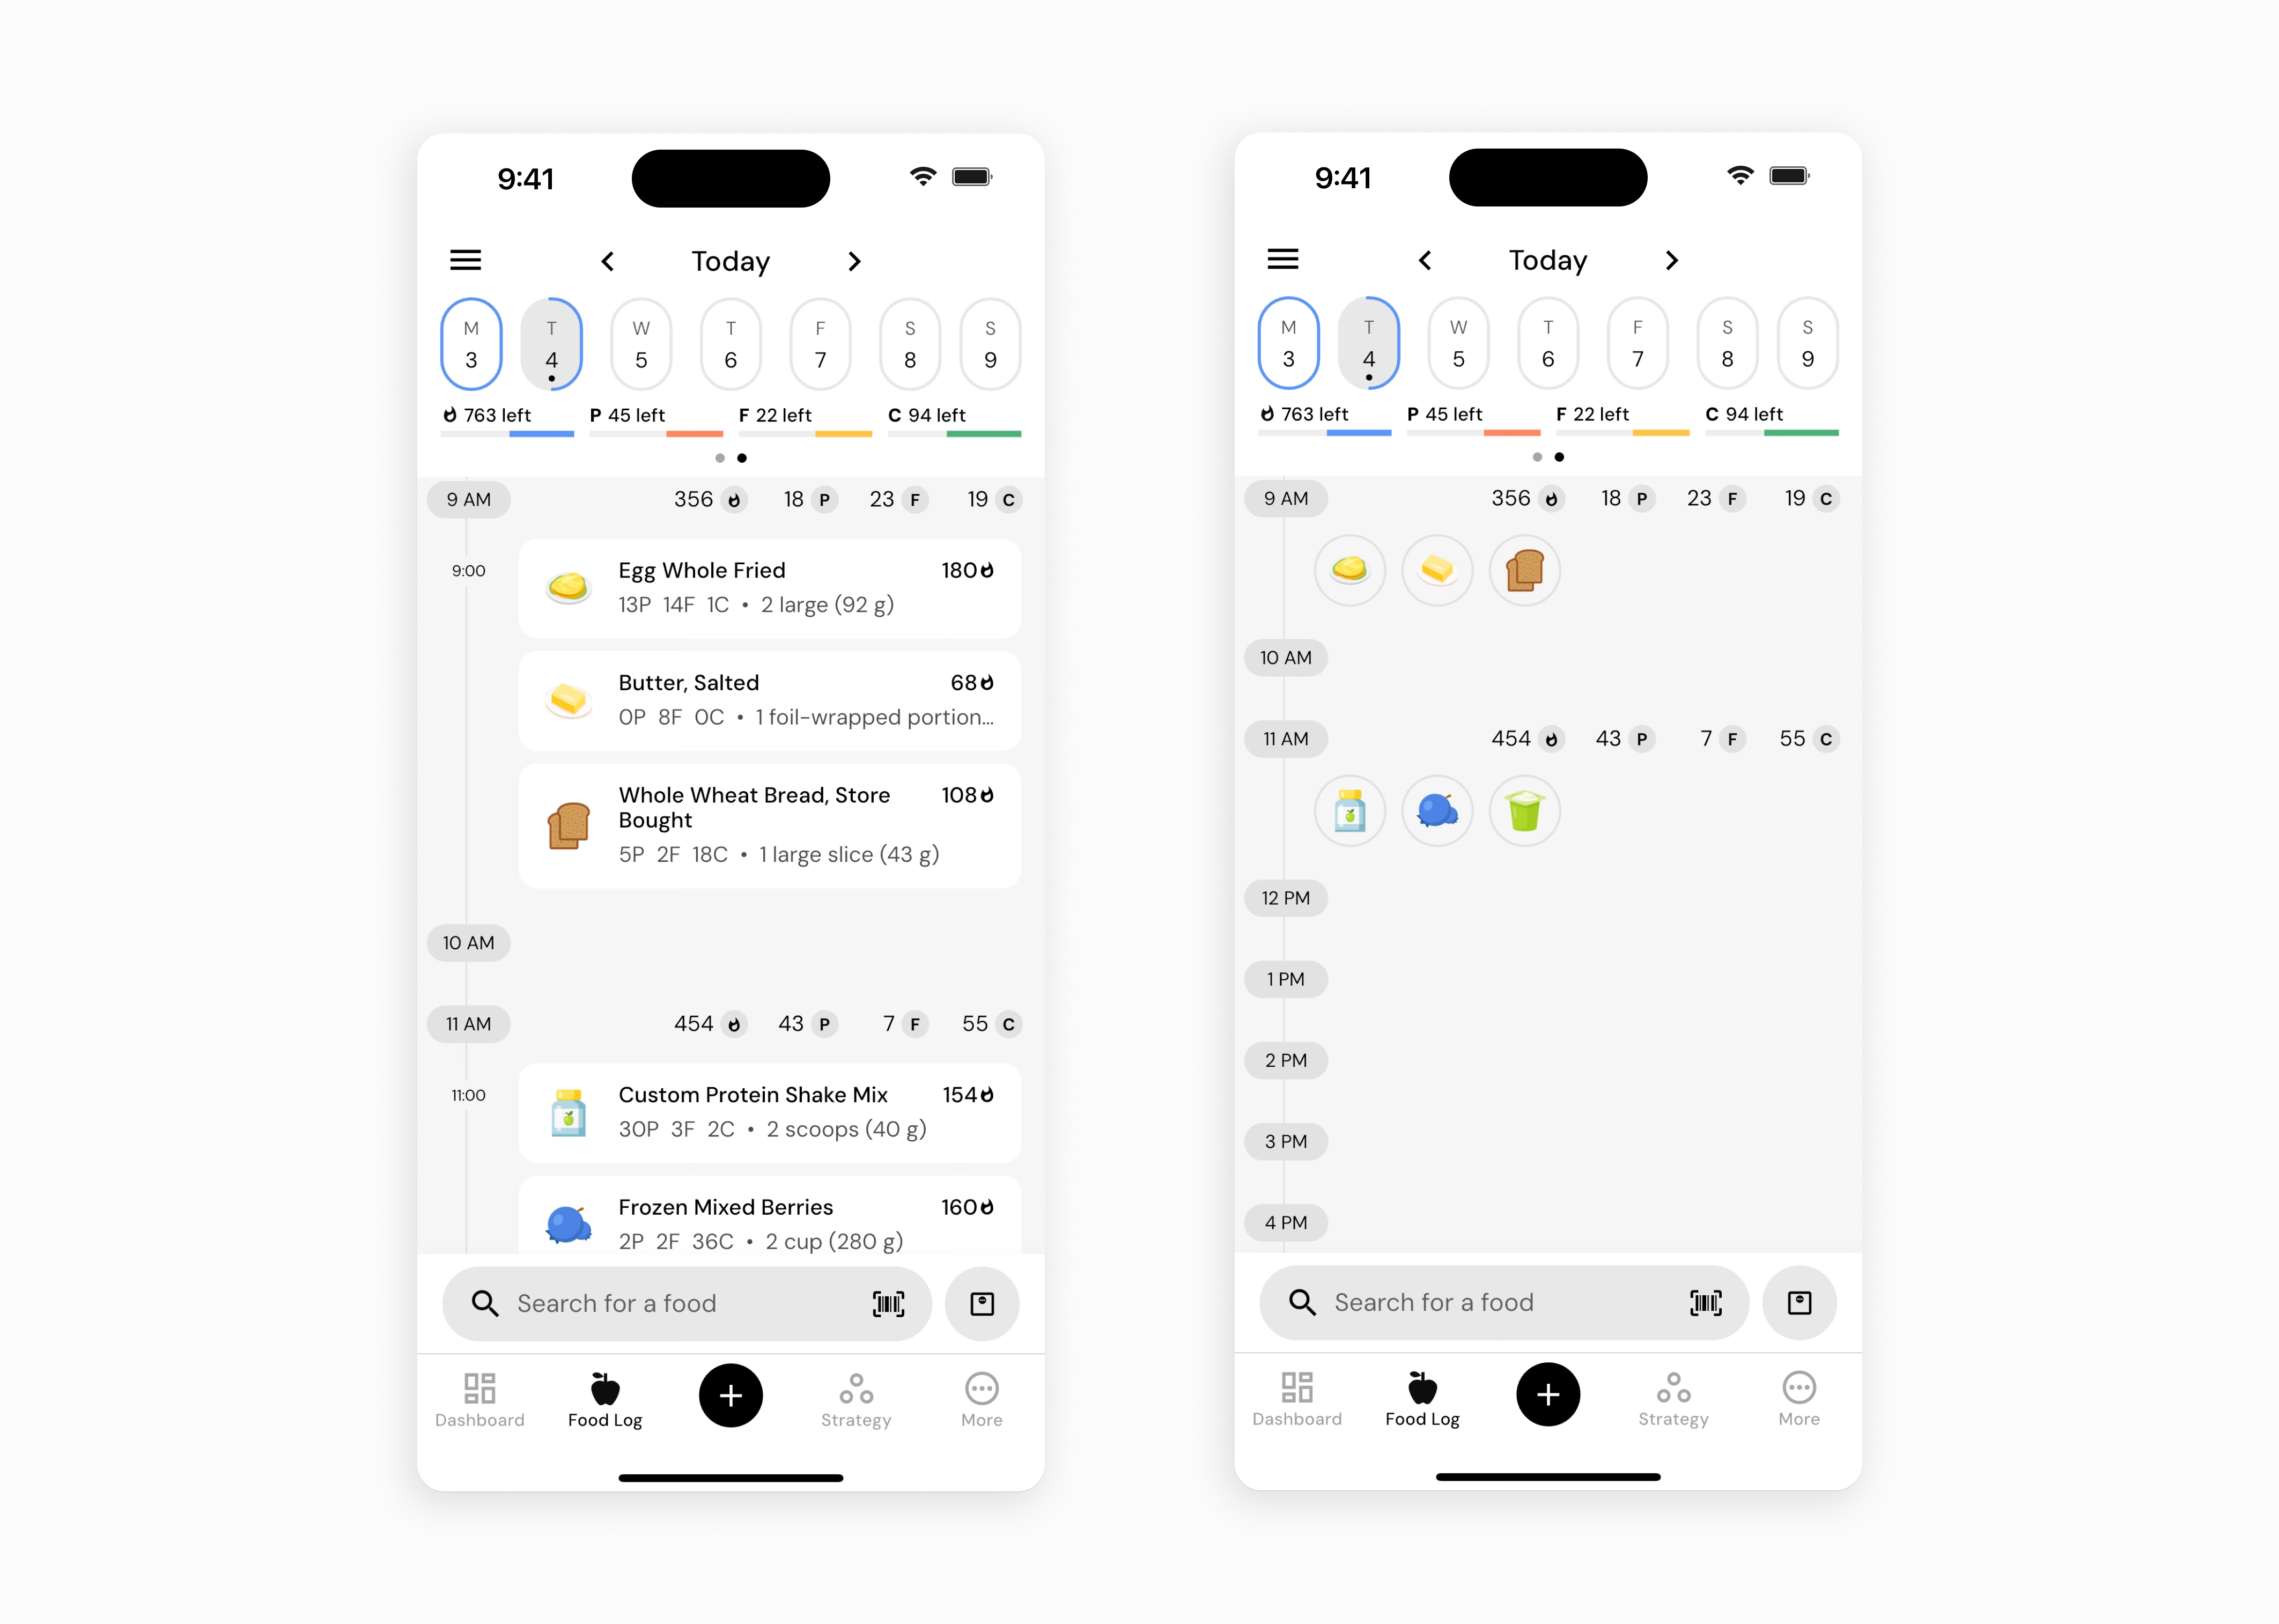
Tile Density determines the size of the food tiles, and all elements on the food tiles: “Comfort” is recommended for most devices, but it may be worth trying “Condensed” if you have a smaller phone, or if you log a lot of unique foods per day.
Display Information options let you customize which information will be present on each food tile on your timeline. Most people prefer to display Macros, Weight, and Serving information, but you can deselect any of these options if you prefer a less information-dense display.
Highlight Element lets you select the element that will show up on the right side of the food tile. Edit is the default, allowing you to edit serving sizes with a single tap (thus saving you one tap each time you want to edit a food). But, if you don’t find yourself editing foods on your timeline, you could instead select Energy as the highlight element, to make the caloric content of foods a bit more prominent on food tiles. Finally, “None” provides a bit more space for long food names.
As you experiment with the Timeline Tile Builder, your selections will be reflected in the two test foods at the top of the screen, so that you can see the impact of your selections immediately.
Now that you’ve learned how to configure your food timeline, you might enjoy one of these articles next:
How to Configure Your Food Logger
Configure Micronutrients that will be Displayed in the Nutrient Explorer
How to Configure your Shortcuts and Toolbar